
Splash of Color
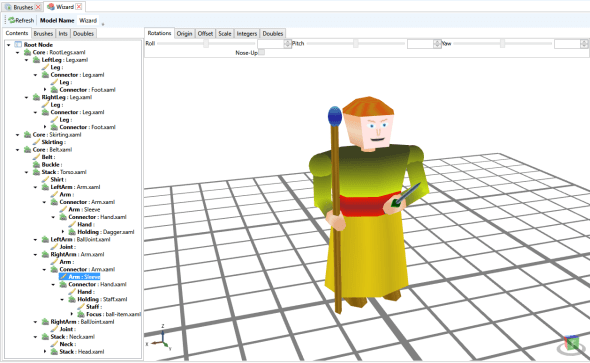
Posted: 2016-01-27 Filed under: General, Guildsmanship, Workshop, WPF Leave a commentPutting all the fragments together gives the basic shape of a meta-model, but doesn’t explain how to get to this:
The first thing to do is to define the set of brushes that can be used to paint the miniature. This is done by opening the “brushes” node for the meta-model in the package explorer.

Resulting in the brushes editor:
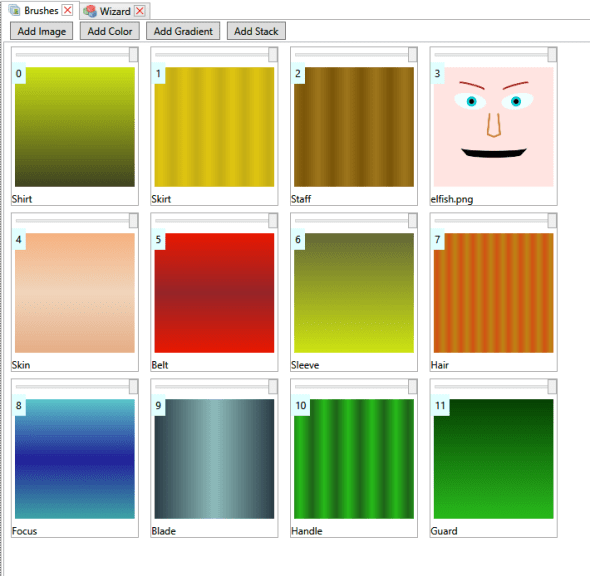
From within it is possible to add colors, images, gradients and stacks. Colors are pretty self-explanatory, they are solid colors. Images are images available to the model either bound directly to the part, or referenced as a resource in the package. Gradients are linear gradients based on WPF gradient brushes. Stacks are sets of brushes that are overlain on top of each other (assuming that the upper brushes have some transparency. Stacks allow multiple directionalities to gradients within a brush.
Next, opening a gradient brush shows the gradient editor:
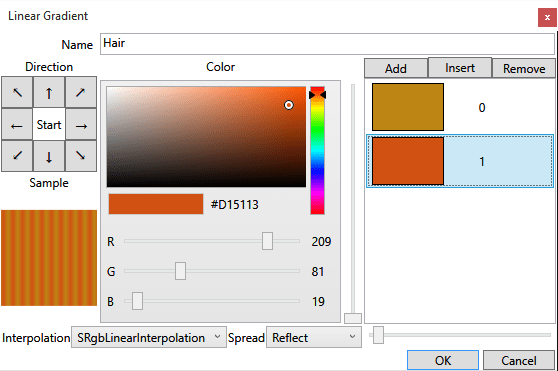
The directionality of the gradient is selected via the array of buttons with arrows. The gradient stops are modified in the list box and buttons on the right side. The slider to the left of the gradient stop list box specifies the gradient stop relative location for the currently selected gradient in the list. The striping effect of the gradient is controlled by the “spread” combo and the slider next to the combo (which determines how the pattern repeats when it ends and how often the pattern repeats).
Now, to the actual painting back in the meta-model editor.

The “brushes” tab lists all the named areas that can have brush references mapped, and the currently mapped reference. Right-clicking one and selecting “assign” brings up a visual list of all the brushes that can be applied.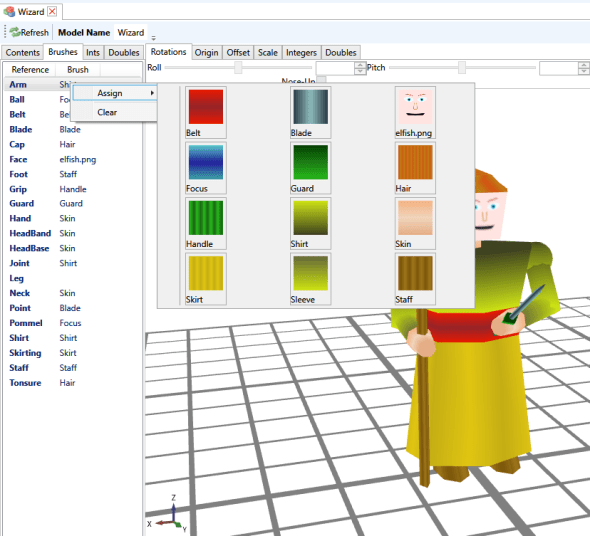
These references are the “global” (for the meta-model) brush references. It is possible to apply variations to individual fragment instances; and this applies to brushes as well as “parameters” such as lengths and radii, and to place more than one fragment in a reference connector.
For example, on the left arm, the first “arm.xaml” segment connected to the torso doesn’t have anything mapped for the “arm” brush, but the “arm.xaml” mapped in it’s “connector” has it’s “arm” brush overridden to be sleeve, which is effectively a reverse direction of the “shirt” brush so that the visual jump at the elbow isn’t so jarring.

Also, I mapped another segment “balljoint.xaml” to the left-arm slot on the torso to create the slightly bulging shoulders.

Finally, to reduce the relative thickness of the forearms, I select the forearm segment, switch to the “doubles” tab, unselect the “yield” checkbox for arm-diameter and freely adjust the diameter.
